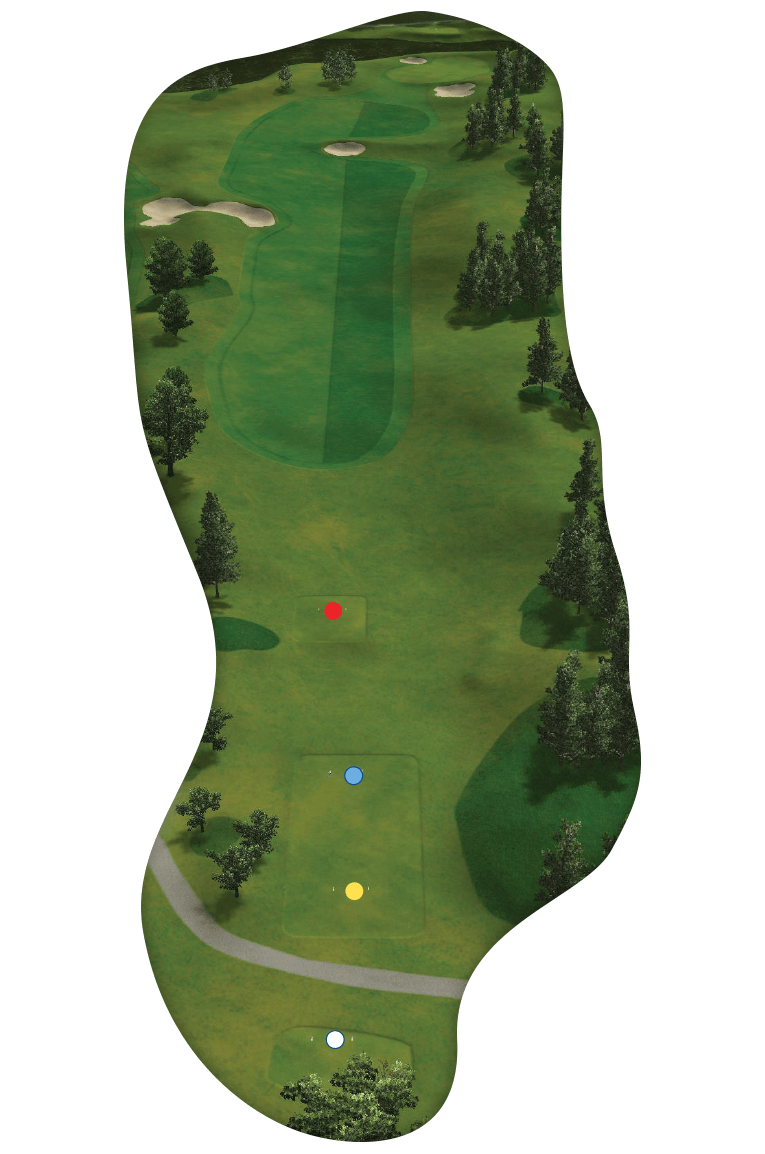
A shorter par 4 where a well placed tee shot will leave a short iron to the green. The green which is two tiered with the back section being lower than the front, makes it extremely important to end on the correct level. The front of the green is protected with a false front and a bunker on the right side.
Par 4
SI 14
353 m
328 M
316 M
285 M
Rode Zee
Hole 11
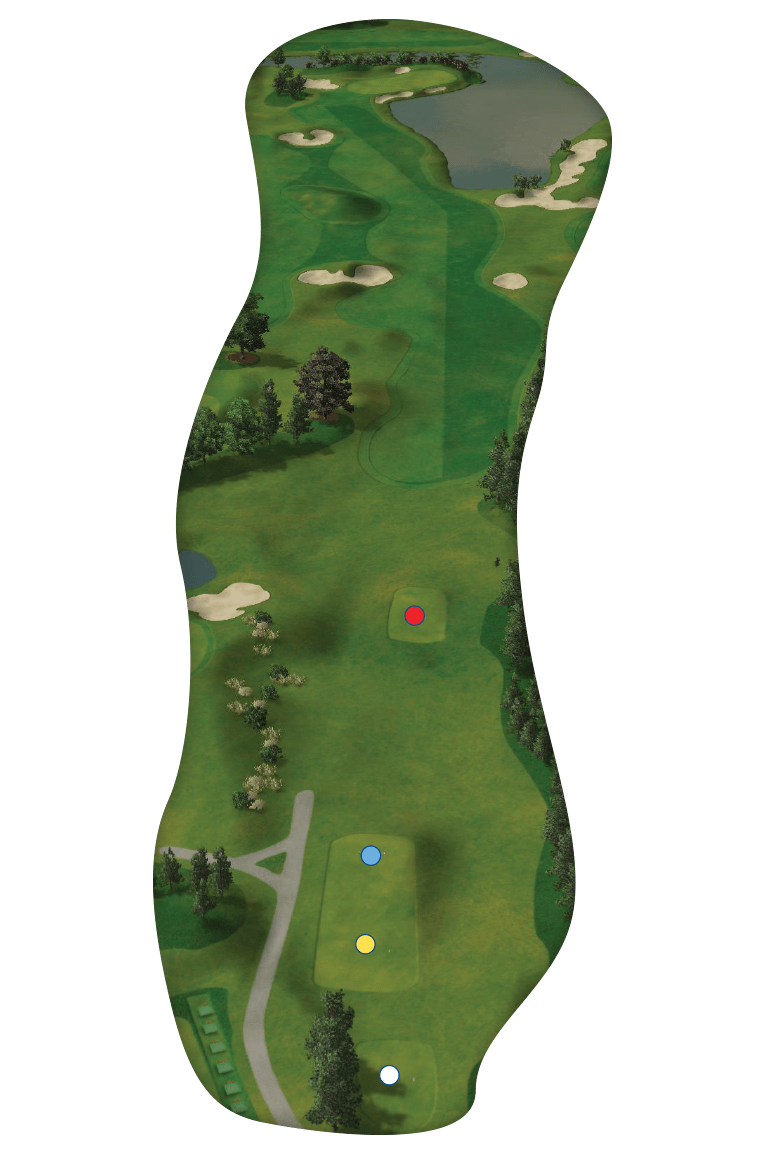
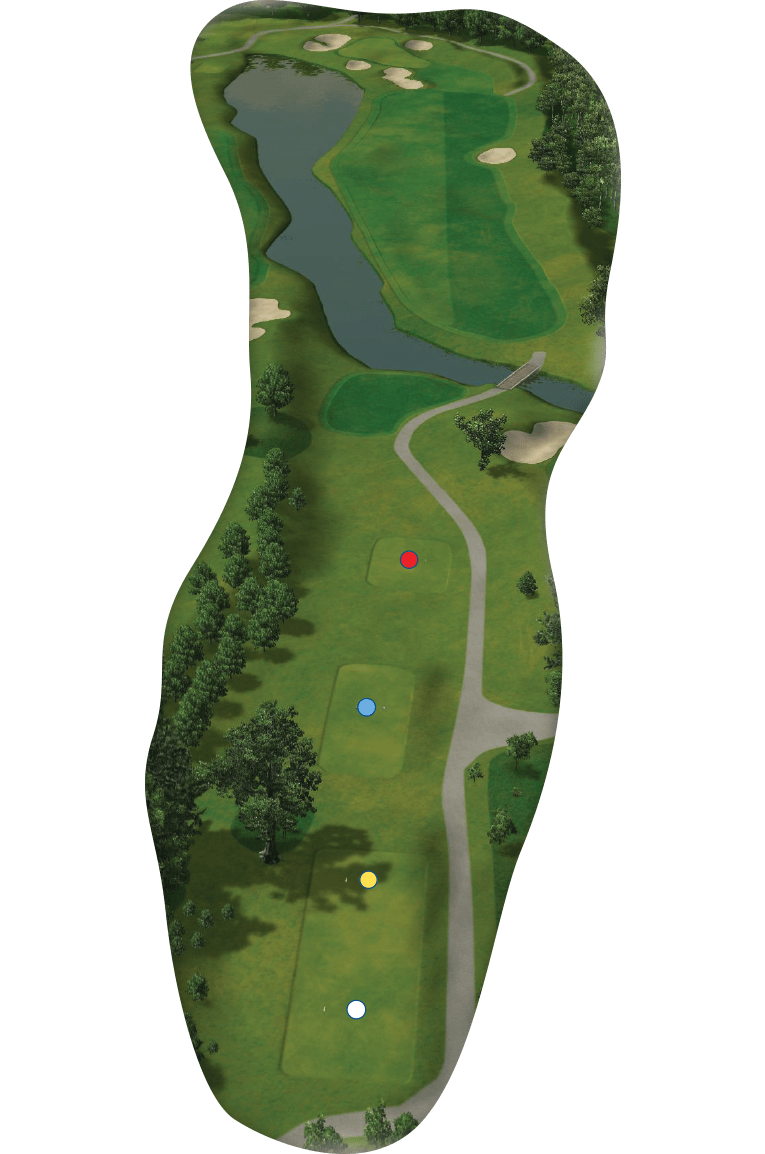
The closer you stay to the fairway bunker on the right the easier the second shot becomes. Aim left for a safer line and the second shot becomes longer with a more difficult angle to the green. The green is protected by some well placed bunkers. Watch out for the carry over the pond, it can be deceptively far!
Par 4
SI 2
409 m
398 M
368 M
325 M
Yellowstone
Hole 12
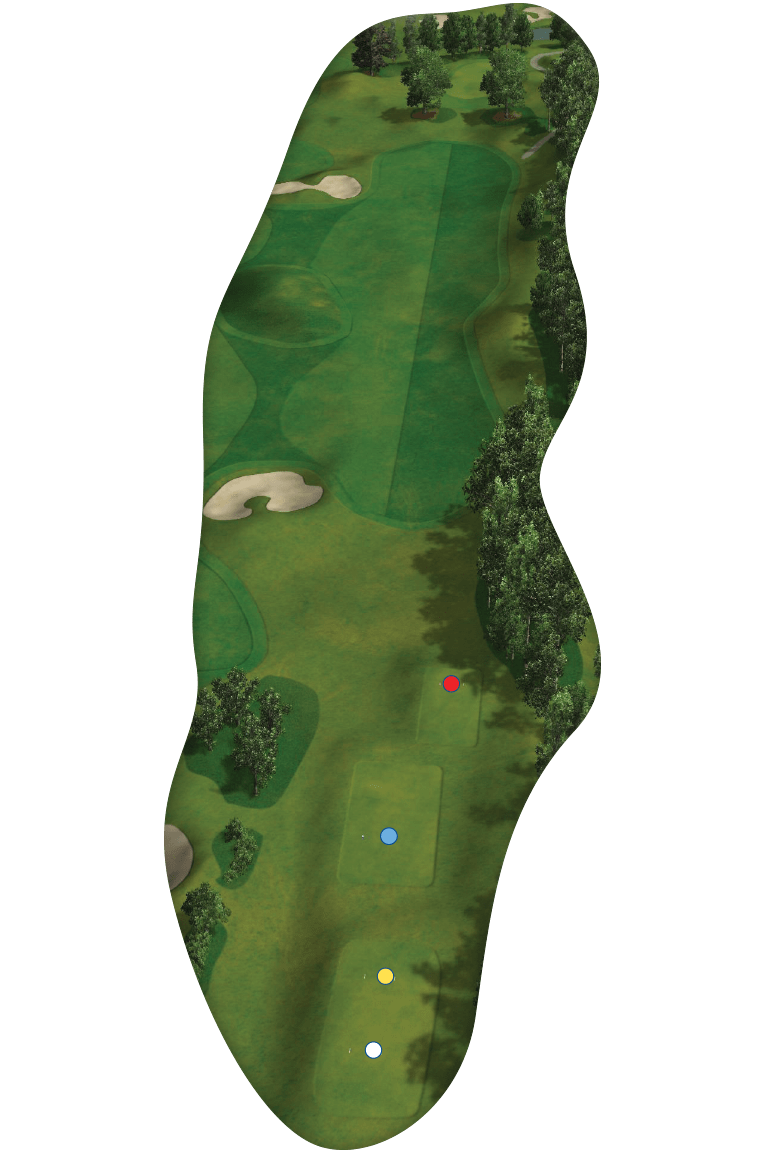
A reachable par 5 for the long hitters. Avoid the bunkers left and right of the fairway with your tee shot. Be careful with your lay up because the fairway bunker is placed about where the ideal shot finishes. Putting can be once again fun with a large undulating green.
Par 5
SI 10
500 m
477 M
462 M
396 M
Al Kufrah
Hole 13
Out of bounds on the right side is a good reason to keep left with the tee shot. Two trees guard the front of a long narrow undulating green. Don’t go left with your approach; a deep gully is waiting to swallow up the ball.
Par 4
SI 18
337 m
328 M
301 M
286 M
Madagaskar
Hole 14
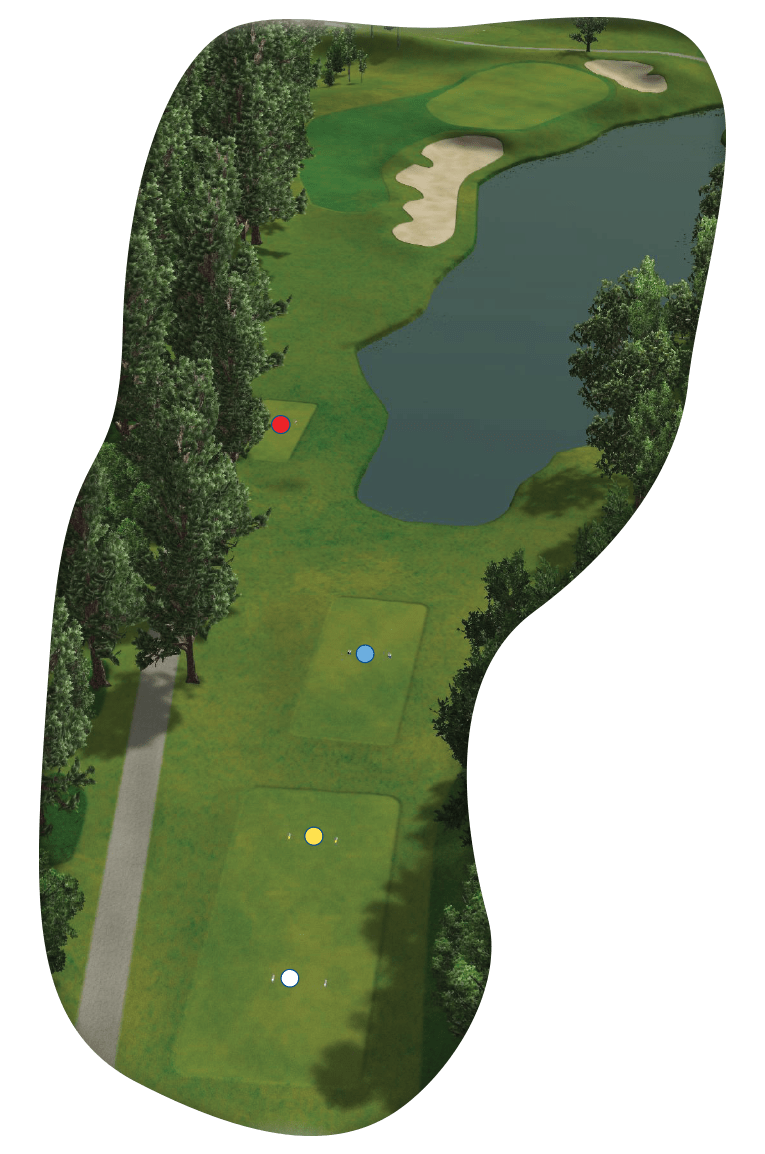
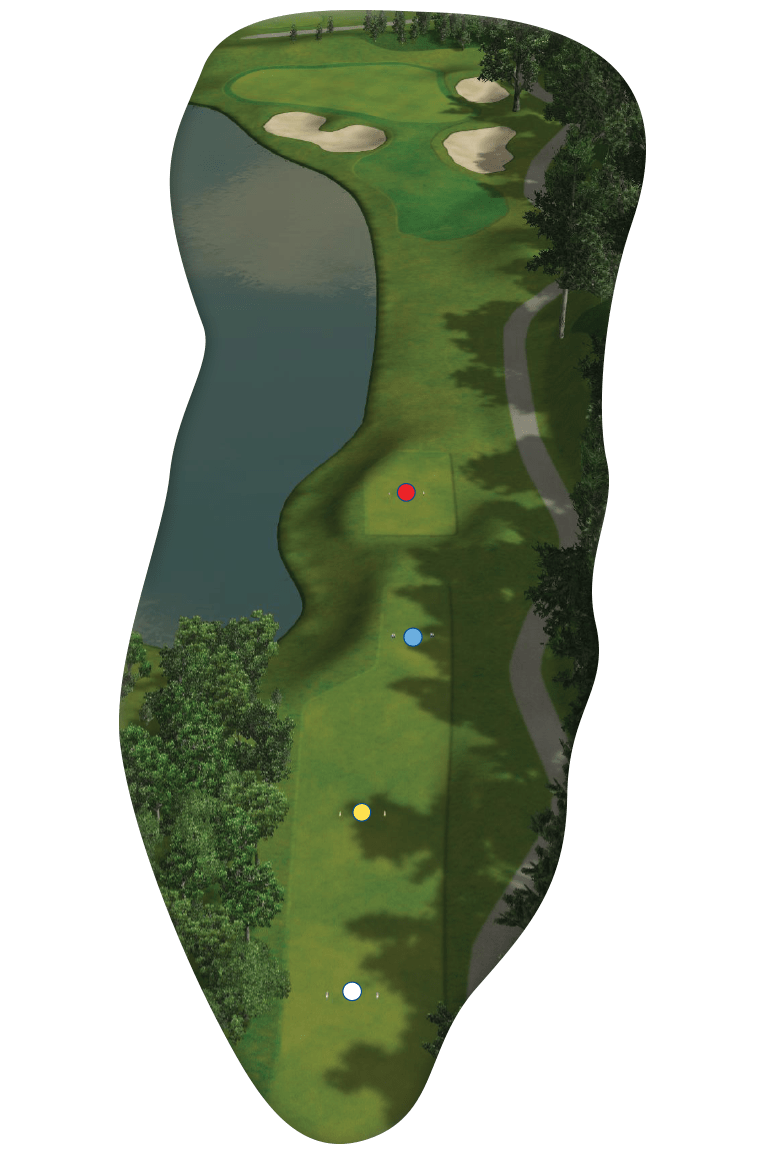
A long par 3 over water with anything landing short right of the green being destined to get wet. In front of the green is a deep bunker waiting. The left side of the green is the safe shot but don’t go too far, trees and long rough will make the recovery treacherous.
Par 3
SI 12
186 m
175 M
153 M
117 M
Buenos Aires
Hole 15
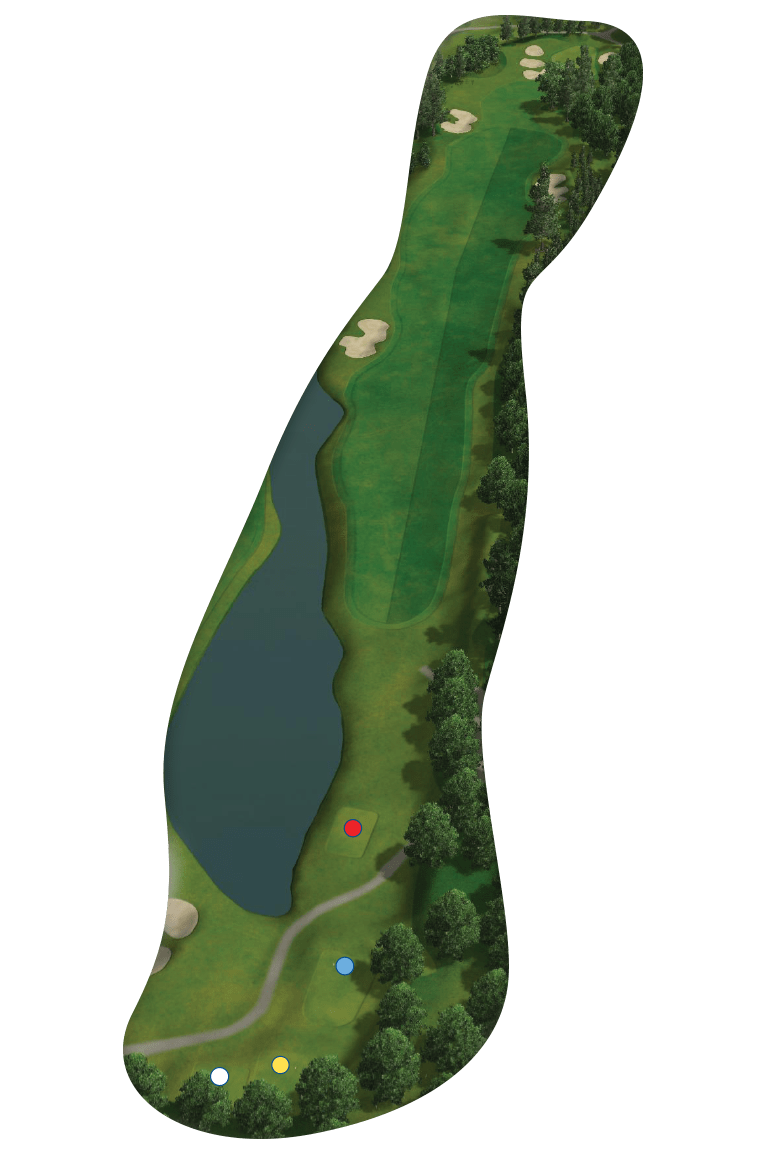
One of the most challenging tee shots on the course, a long carry, a water hazard left and out of bounds right makes for a very difficult drive. Once the tee shot has been successfully negotiated the shot to the green is tricky with once again two tiers, but this time the back section is set at an angle to the line of play which makes it extremely difficult to hit it close to the hole. An all round great hole!
Par 4
SI 4
383 m
370 M
336 M
300 M
Mount Ross
Hole 16
The last par 5 of the day and once the drive has success fully hit the fairway the 16th is a good birdie chance. It is best to keep the second shot left, this avoids a tree that blocks out the green from the right side. This green has three levels three bunkers and a St Andrews like ‘Valley of Sin’ in front just to keep things interesting.
Par 5
SI 6
491 m
485 M
465 M
428 M
Campbell Island
Hole 17
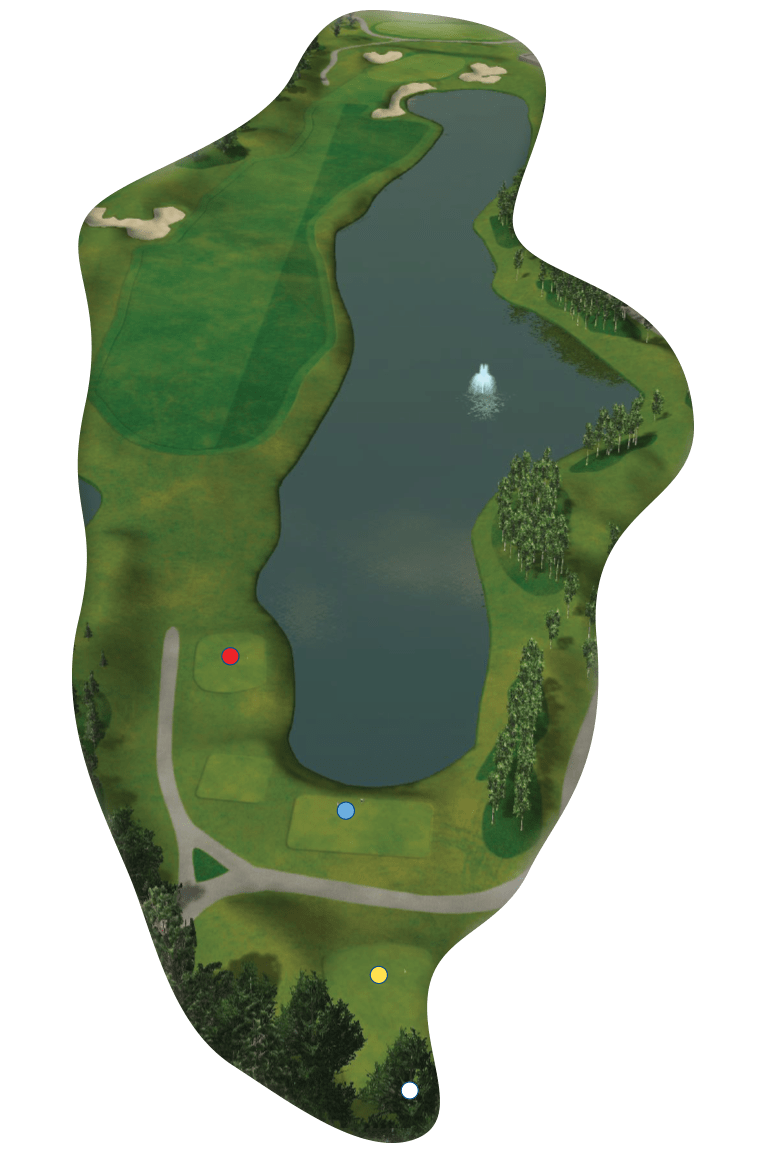
A fairly easy looking hole, but beware to take enough club to carry the bunkers in front of the green. When the pin position is cut left “watch out” the water can be much more in play then you might think!
Par 3
SI 16
161 m
150 M
132 M
107 M
Taiwan
Hole 18
The ideal line from the tee is somewhere between the bunker and the pine trees. Club selection with the second shot is critical; anything slightly right will catch at best the bunker, possibly the water. The green is built with a ‘Biarritz’ style swale through the middle that makes putting interesting! A great finishing hole!
*Laatst bijgewerkt: Deprecated: IntlDateFormatter::__construct(): Passing null to parameter #2 ($dateType) of type int is deprecated in /var/www/vhosts/blubhoreca.nl/httpdocs/wp-content/themes/blub-child/functions/SaveOptionsSaveDate.php on line 32
Deprecated: IntlDateFormatter::__construct(): Passing null to parameter #3 ($timeType) of type int is deprecated in /var/www/vhosts/blubhoreca.nl/httpdocs/wp-content/themes/blub-child/functions/SaveOptionsSaveDate.php on line 32
21 augustus - 10:09


 4 Z
4 Z